articles
cleaning the background
Usually I don't like wildlife images with a subject on an absolutely “creamy” background unless this effect was obtained in a natural way — with a lens and not through postprocessing. When the background isn't detracting from the subject, I rather prefer that the objects in it, such as vegetation, soil, or rocks, are blurred but still a little recognisable than when it is looking just like a homogenous colour backdrop. In certain cases, however, I agree that the background has to be tweaked after the shot. More often it is necessary in the images of small subjects created with use of a macro lens. Since narrow aperture and consequently greater depth-of-field are typically required in macro photography, the not very distant objects in the background may appear in the image not blurred enough. Such photographs are then criticised as having a disturbing, “busy”, background — when the separation of the main subject isn't sufficiently provided.
Macro photographers often use artificial backdrops — prints or colour paper — that they put behind the subject before making the shot. Obviously, this is possible only with static or slow-moving and not shy subjects, such as flowers or caterpillars. In most other situations the background can't be controlled that well, and the photographer is confronted with a dilemma — to leave it as is, or to improve it in a graphic editing software. Sometimes the background looks so “dirty” that there is no other choice than to work on it in Photoshop. In my photography practice this need usually arises when I have photographed and underwater subject with a macro lens.
I use a small water tank that I built extra for this purpose from acrylic glass. Since I currently have only one such tank, it is quite wide, so that I can put also larger fishes and amphibians in it. For small animals, there is too much space, and this causes two problems. First, it is difficult to compose an image because the animal has too much freedom to move along the front glass and quickly leaves the view field of the lens. Second, the subject tends to swim away from the front glass thus leaving the area in focus. To solve these problems, I use dividers which are also made of acrylic glass. One of them limits the distance from the front glass and is made non-reflective — to absorb flash bursts.
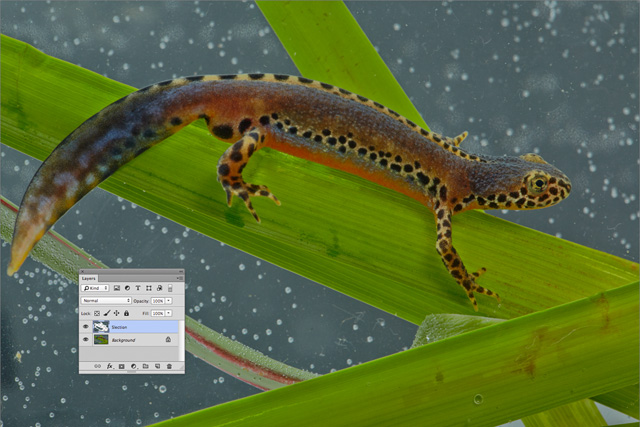
When I photograph water animals in this tank, I fill it with clear water. Nonetheless, swimming dust and dirt particles can't be avoided completely: Even when the water was absolutely clean they emerge as soon as the animal and the decoration objects are there. These particles appear in the photographs due to magnification by the macro lens. Air bulbs are a much worse problem: When the water was fresh and cold, they remain there for hours and appear in the photographs. When they are out of focus, it is even worse because they look like snow flakes. All this you can see in the picture below.
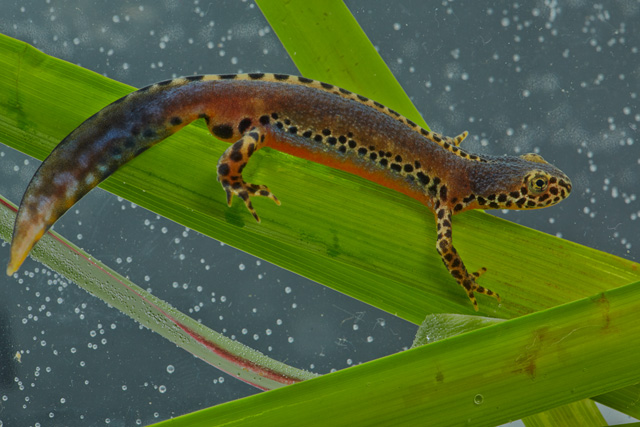
Here you see the unprocessed original. Not only the dots from small air bulbs make the background messy, but the entire image looks “dirty” due to particles of fuzz and dust that were swimming in water. (Click on picture to enlarge.)
As you see, this image of a male Alpine Newt looks really terrible. The background contains all kinds of dirt both, in and out of focus: fuzz, dust particles, air bulbs. Cleaning it manually even with modern content aware tools in Photoshop will be very difficult and will take very long. In such cases a more automatic cleaning technique has to be applied.
First, I use the Magic Wand tool ( ) with sample size set to “point” and with tolerance 30 to make a rough selection. Tolerance should be always adjusted to a specific image. Usually the value is 15 to 35, and I determine it through a couple of trials. For this image, 30 was just fine. Alternatively, or additionally, you can try to do the same with the Quick Selection tool (
 ).
).
After that with the Lasso tool ( ) I improve the selection. Obviously, you need a graphic tablet to effectively accomplish this task. When I am satisfied with the precision of the selection, I cut out the selected areas of the image to a new layer — as shown in the picture below: I simply press Cmd+X (or Ctrl+X in Windows) key combination to copy the selection to memory; then I paste the selection by hitting Cmd+v (or Ctrl+v in Windows). This creates a new layer that contains only the selected parts of the image.
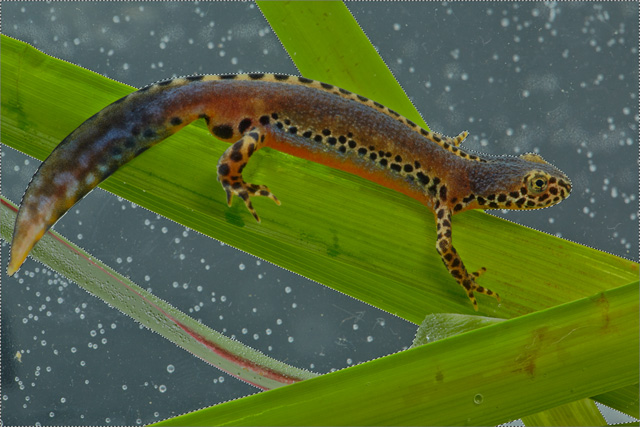
This picture shows the image after the background areas were selected and copied to a new layer. (Click on picture to enlarge.)
The rest of cleaning work has to be done on this layer. It can't be the same layer as the foreground because the edges of the areas that are outside the selection will “leak” into the selected when you apply blur filters. Therefore we need to separate the selected area entirely. In the main layer only the foreground of the image will remain that should be untouched by processing. We will need this layer in the final stage of work — if you will want to restore the selection or to mask this area again.
What I need to do the next is just to blur the selected areas with any of the various methods that Photoshop offers. Personally I prefer the Lens Blur filter for it simulates the effect of an out-of-focus blur provided by a real lens. I choose Filter → Blur → Lens Blur... from the main menu of Photoshop. For this image a very strong background blur is needed. I choose Octagon with radius 100 for Iris Shape.
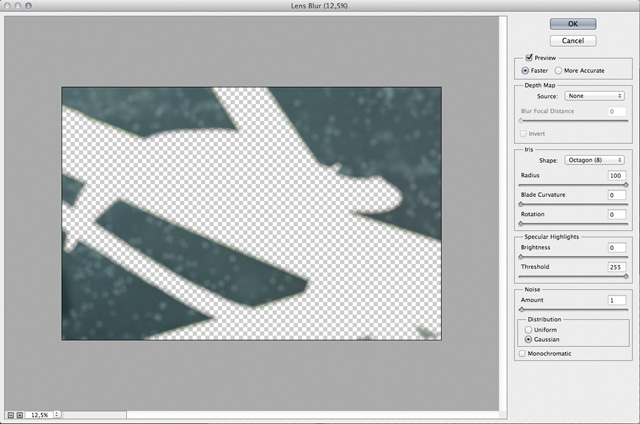
Here you see the Lens Blur filter used on the copied layer with the background. (Click on picture to enlarge.)
To make it look more real, I also add some noise — 1%. To make the background more clean, I apply this filter a couple of times.
When the layer with the foreground is visible, it becomes clear that the blur has resulted in a gap between the edges of the foreground and the background: The stronger was blur the more evident the gap. You see this in the picture below.
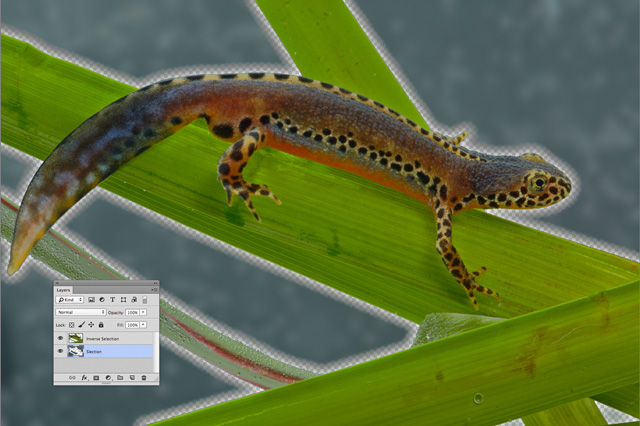
When the visibility of the foreground layer is on, the gap between it and the now blurred background layer is clearly recognisable. (Click on picture to enlarge.)
I haven't found any better solution yet than to fill the area behind the foreground shape with the same background pattern. It can be done either before blurring or after. Considering how messy the background was in this particular image, I decided to do it after the use of Lens Blur filter. I made a rough selection of the empty area and applied the so-called “content aware” fill which is possible since Photoshop CS6. To do it just choose from the menu Edit → Fill, and then in the pop-up dialog select Content Aware. The selected area will be filled with similar pattern as the rest. Some parts won't look good enough — as shown in the picture below.
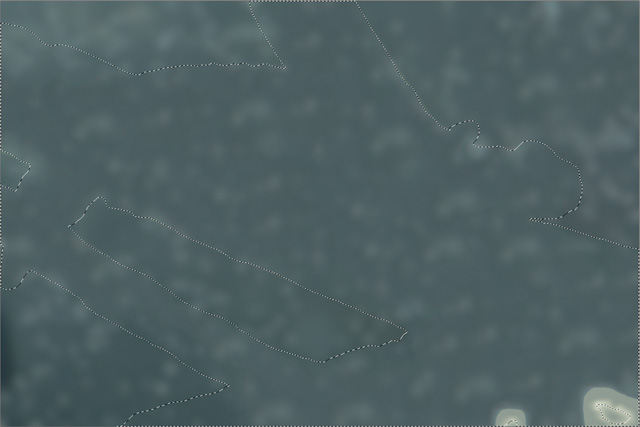
I selected the empty area of the background layer, including the blur edge, and applied content aware fill to it. (Click on picture to enlarge.)
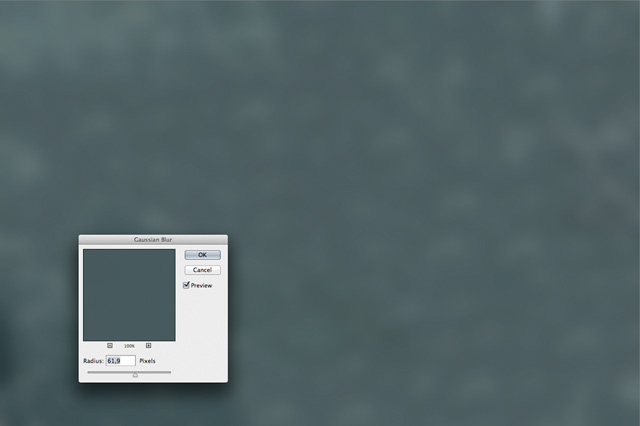
Now select the imperfections and repeat content aware fill till the result is satisfying. To improve the smoothness of the background even further I used Gaussian blur on the entire surface. To achieve a strong blur, I set a very large radius of over 60 pixels as you see in the picture below.
Gaussian blur creates very fine gradients that usually lead to colour banding effects — also known as “posterisation”. You may notice in the above picture that some spots remain distinctive instead of merge with the background. The reason of this is the inability of the computer screen to display all the colours in the gradient due to insufficient gamut. You can solve this issue if you reduce the smoothness of the background and thus of the gradient. This can be achieved through adding some noise. As shown in the picture below, in this photograph it was enough to add 2% of noise for the colour banding to disappear.
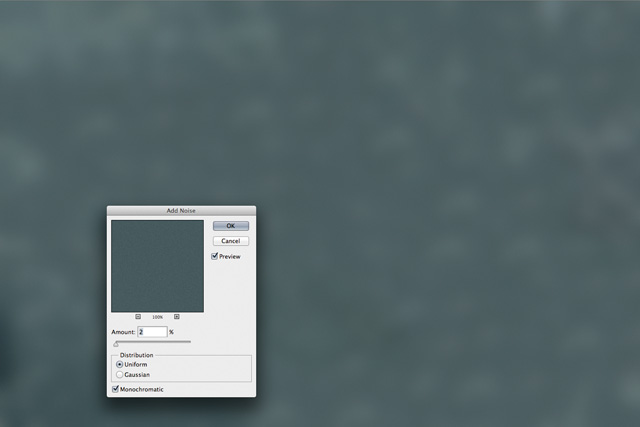
Gaussian blur very often causes colour banding (posterisation) when the image is displayed on a medium with a narrower gamut. This effect can be removed by adding a little noise in the processed areas. In this image I added 2% noise. (Click on picture to enlarge.)
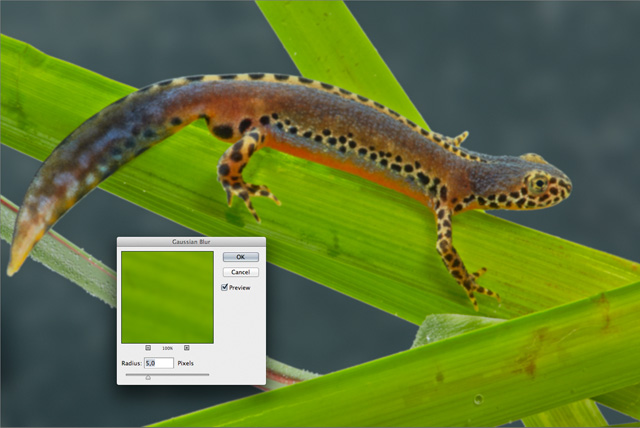
Now it's time for improvements in the foreground layer. First of all, the edges of it may now look too sharp, i.e. the background may appear as if cut out because the background is now very smooth. To solve this problem any creative ideas are good. For instance, I did the following. I duplicated the foreground layer and blurred the lower one with Gaussian blur a bit (with 5 px radius).
As shown in the following picture, this made the edge of it not so sharp. Then I made the non-blurred copy visible again so that it covered the blurred copy but the unsharpened edge remained a little visible. Then I merged these layers to one foreground again.
After that some fine hand work on the edge was required to make it look more natural. I used mainly the Blur tool ( ) and the Clone Stamp (
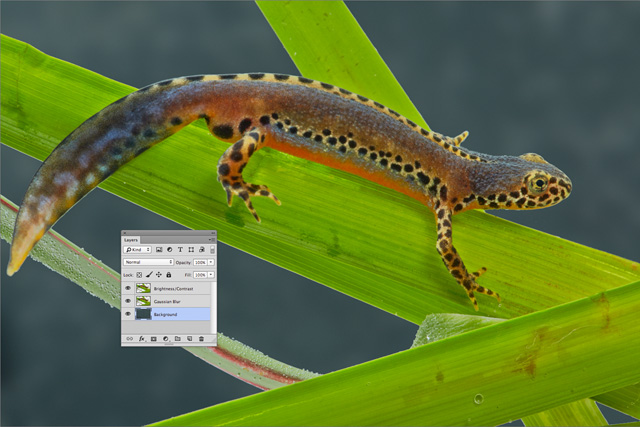
 ). In this stage I also made tonality, brightness and saturation adjustments on each of two layers — the background and the foreground.
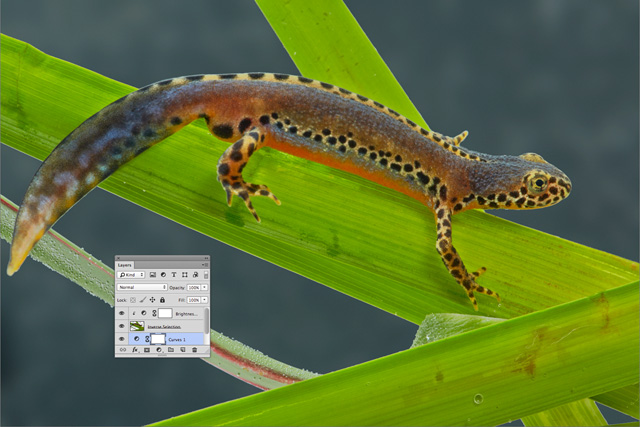
I made colour and tonality adjustments on the background and foreground layers separately before I merged them to the final image. (Click on picture to enlarge.)
When I was satisfied with the results, I merged all layers to one final image that you see below. To compare it with the original, place the mouse pointer on it.
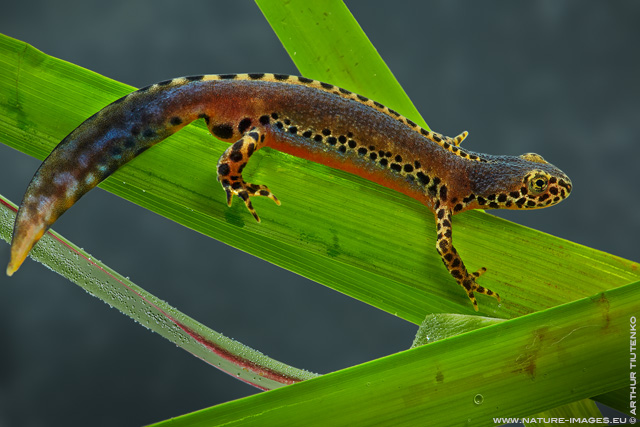
Compare the final image and the original. (To view the original, place the mouse pointer on the picture. To view the result with higher resolution, click on the picture.) Of course, for the final image, I did all usual adjustments of tones, saturation, contrast and sharpness.
Of course, as in so many images captured with macro lenses, the background in this one looks very homogenous, and the foreground appears as if sticked on it. However, there is nothing wrong because the same effect can be observed in macro photographs that didn't undergo the post-processing described in this article, i.e. that remained as shot. See a typical example on the right. Also, with this photograph of the newt, if we compare the original with the result, we would recognise that in the original the foreground was also looking “sticked”. The only difference was that the background was extremely messy. In the process described above I solved this issue, and, as you see, the result was worth the efforts.
